
Once you have created an Outbound Calling Template the next step is enabling outbound calling on the client’s workspace and creating a bundle — a pre-configured calling pack that combines an AI agent, phone number, and template into a single option your client selects when launching a campaign.
This can be done during new workspace creation (Step 5 of 6) or by editing an existing workspace at any time.
Time to complete: ~5 minutes
Who this is for: Agency admins enabling outbound campaigns for a client workspace
Category: Campaigns
Before You Begin
You will need:
- At least one outbound calling template already created, see Create an Outbound Calling Template
- At least one outbound-ready AI agent and phone number set up in your Voice AI provider account (Retell, VAPI, or ElevenLabs)
- The assigned AI agent must include all template variables and
{{campaign_notes}}in its prompt.
What Is a Bundle?
A bundle is the outbound calling pack your client sees and selects when launching a campaign. It combines three things:
| Component | What It Does |
|---|---|
| Voice AI Agent | The AI Voice Agent that makes and conducts the calls |
| Phone Number(s) | The number(s) calls are made from |
| Template | Defines the lead list schema and variables passed to the agent |
A workspace can have multiple bundles — one per use case, agent, or campaign type. Your client chooses which bundle to use each time they launch a new campaign.
Step 1 — Navigate to the Outbound Step
During new workspace creation:
Complete Steps 1–4 of the Create Workspace wizard as normal, then proceed to Step 5: Outbound.
On an existing workspace:
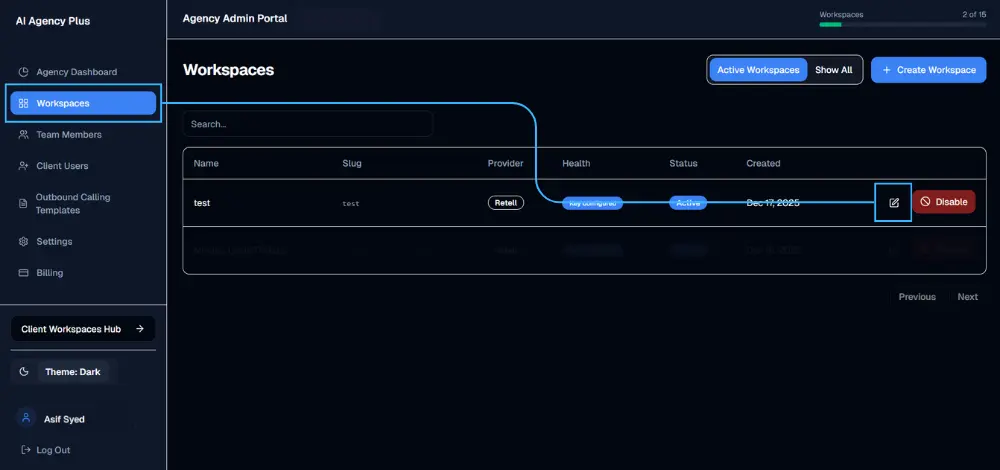
- In the left sidebar, click Workspaces.
- Locate the workspace you want to configure.
- Click the edit icon (✏️) on the right side of the workspace row.
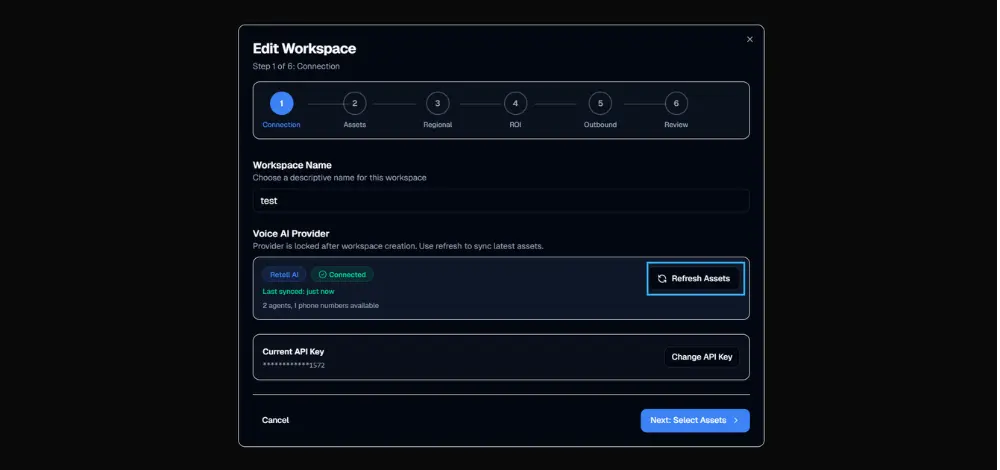
- The Edit Workspace wizard opens at Step 1: Connection.
Step 2 — Review Available Resources
If you have added new agents or phone numbers in your provider account, click Refresh Assets on the Connection screen to pull in the latest assets, then select them in Step 2: Assets.
Outbound resources from your Step 2 selections:
- 1 agent available
- 1 phone number available
Only agents and phone numbers already assigned to this workspace are available for bundle configuration. If agents or phone number is not displayed, go back to Step 2 (Assets) and assign the missing assets.
Step 3 — Enable Outbound Calling
Toggle Enable outbound calling to ON.
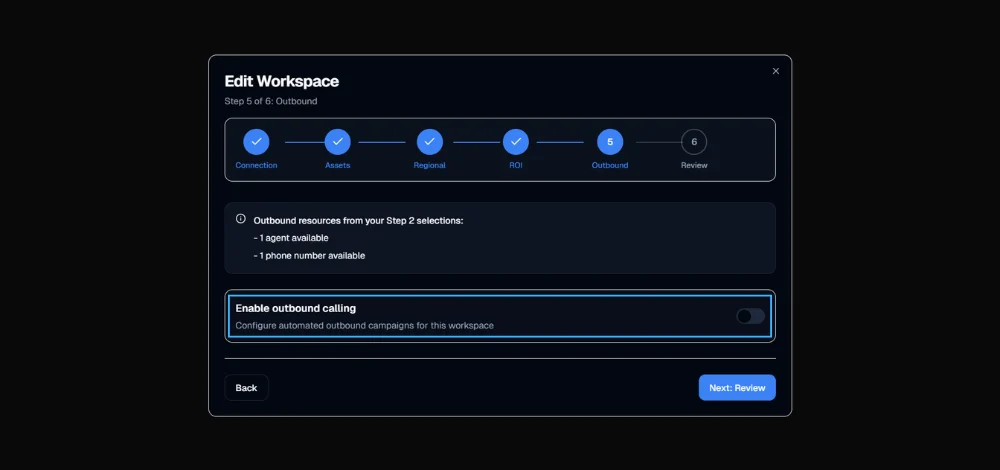
The subtitle reads: “Configure automated outbound campaigns for this workspace.”
Once enabled, the bundle configuration section appears below the toggle.
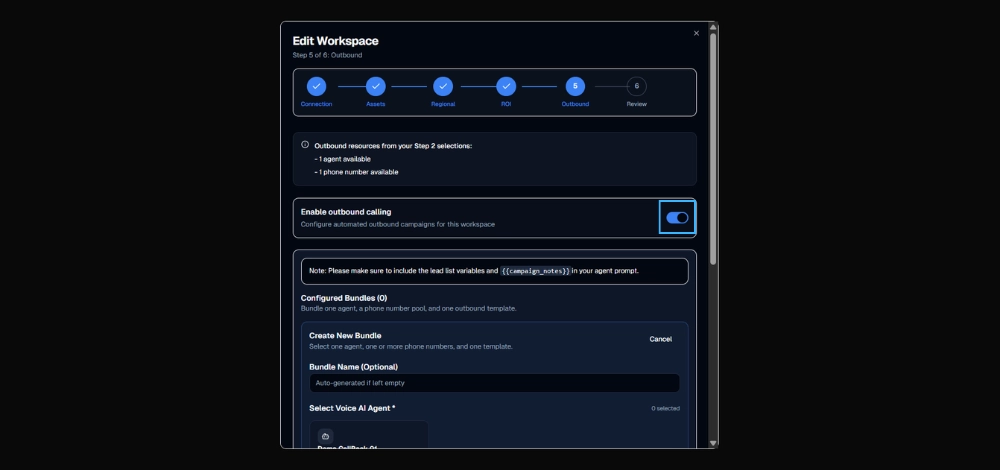
💡 Outbound can be toggled off at any time. If you need to temporarily disable outbound campaigns for a workspace, edit the workspace, go to Step 5, and toggle it off. Existing bundle configurations are preserved — toggling back on restores them.
Step 4 — Create a Bundle
Click Create New Bundle to open the bundle form.
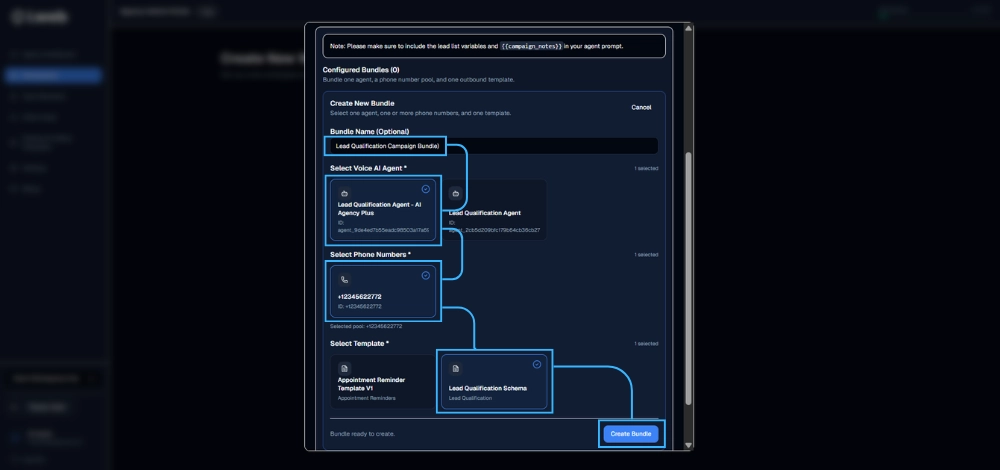
Bundle Name (Optional)
Enter a descriptive name — this is what your client sees when selecting a bundle at campaign launch. If left empty, bundles are auto-named sequentially: Bundle 1, Bundle 2, etc.
💡 Always name your bundles. Your client sees this name directly in their workspace.
Appointment Reminder Callsis far more useful to them thanBundle 1. Clear names help clients self-serve confidently and reduce support questions.
Select Voice AI Agent
Choose the AI agent that will conduct the calls for this bundle. Only agents assigned to this workspace in Step 2 are listed here.
⚠️ The selected agent must have all template variables configured in its prompt. If the agent prompt does not reference
{{lead_name}},{{appointment_date}}, or whichever variables are in your template, those values will not be used during calls.
Select Phone Numbers
Choose the phone number(s) calls will be made from. You can select multiple numbers for a single bundle — Voice AI Portal distributes calls across all selected numbers.
Select Template
Choose the outbound calling template that defines the lead list schema for this bundle. Only templates you have already created appear here.
⚠️ No templates showing? You need to create one first — see Create an Outbound Calling Template.
Once all three fields are selected, the Create Bundle button activates. Click Create Bundle to save it.
Step 5 — Add More Bundles (Optional)
Multiple bundles can be created for the same workspace. Repeat Step 4 for each additional bundle.
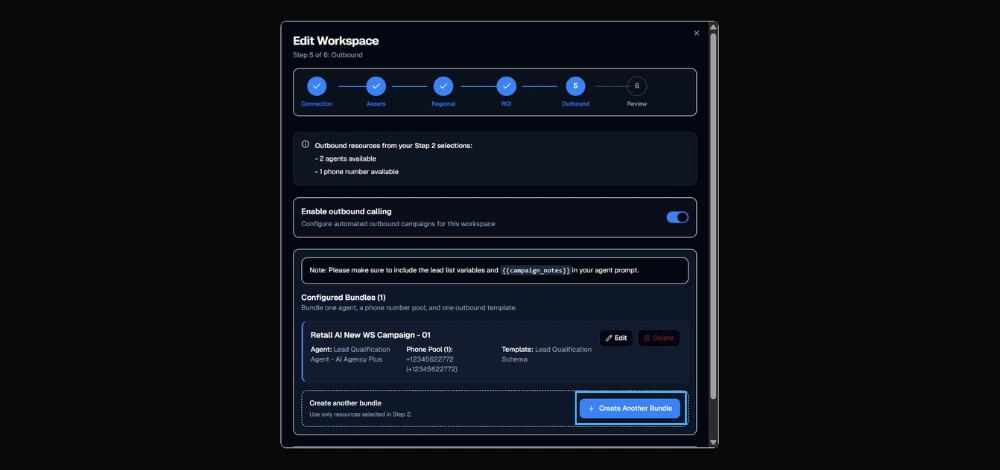
When to create multiple bundles:
- The workspace has more than one AI agent, each handling a different use case
- The client runs different campaign types — e.g., appointment reminders and lead qualification — that require different templates
- You want to separate phone numbers by campaign type for reporting clarity
Each bundle appears as a separate option when your client creates a new campaign.
Step 6 — Save and Confirm
Once all bundles are configured, click Next: Review →.
On the Review screen, confirm:
- Outbound is listed as Enabled
- All bundles are shown with their correct agent, phone number, and template
Click Save (existing workspace) or Create Workspace (new workspace).
Outbound calling is now live for this workspace. Your client will immediately see the option to create outbound campaigns from their workspace dashboard.
Managing Existing Bundles
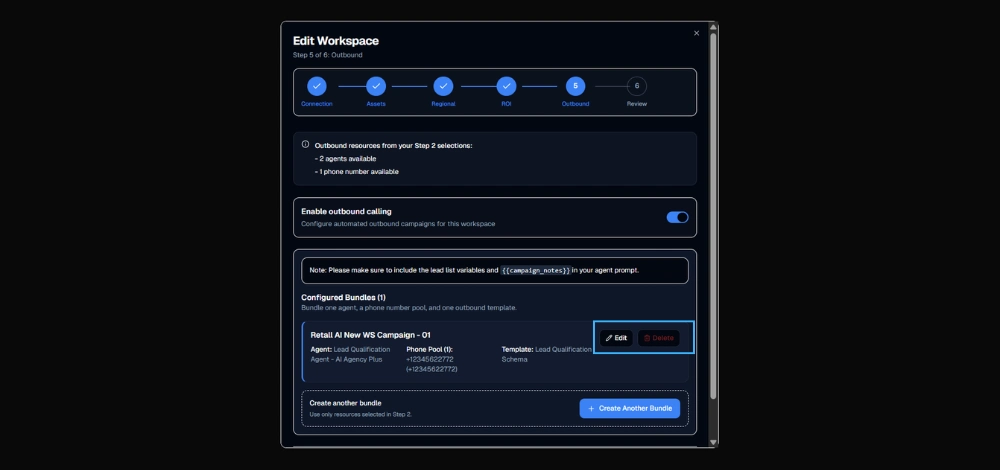
To edit or remove bundles after the workspace has been saved:
- Click Workspaces in the left sidebar
- Click the edit icon (✏️) on the workspace row
- Navigate to Step 5: Outbound
- Edit or delete existing bundles as needed
- Click through to Review and Save
Troubleshooting
| Issue | Solution |
|---|---|
| No agents available in bundle form | No agents assigned to this workspace — go back to Step 2 (Assets) and assign at least one |
| No phone numbers available in bundle form | No phone numbers assigned — go back to Step 2 (Assets) to assign |
| No templates in the template dropdown | No templates have been created yet — see Create an Outbound Calling Template |
| Create Bundle button stays greyed out | All three fields (agent, phone number, template) must be selected before the button activates |
| Client can’t see outbound option in their dashboard | The outbound toggle is off — edit the workspace, go to Step 5, and confirm Enable outbound calling is ON and at least one bundle exists |
| Agent not using lead data during calls | Template variables not referenced in the agent’s prompt — check {{variable_name}} syntax matches exactly |
| Campaign notes not passed to agent | {{campaign_notes}} missing from agent prompt — add it and republish the agent in your provider dashboard |